








A great drum break already contains the thing most producers spend the rest of the session trying to create: movement.
The kick and snare are not perfectly isolated. The hi hats breathe around them. Ghost notes change the momentum between the main hits. Room tone connects the kit. Cymbal tails overlap. Small timing and velocity differences create a pocket that would be difficult to reproduce by drawing every note on a grid.
The problem starts when processing removes those relationships.
Too much compression flattens the ghost notes. Hard transient shaping turns every hit into the same shape. Aggressive EQ removes the body that made the break feel like one recording. Excessive clipping can make the loudest snare sound exciting while the groove underneath it disappears.
This guide shows how to process drum breaks while keeping the timing, dynamics and natural movement that made the break worth sampling in the first place.
The Short Answer
To process a drum break without killing the groove:
- Choose the right break before reaching for plugins.
- Match the tempo and decide the chop before heavy processing.
- Gain stage the break so processors are not being hit too hard.
- Use EQ to solve specific problems instead of cleaning everything.
- Compress lightly enough that ghost notes and cymbal movement still breathe.
- Use saturation for density and character before using extreme dynamics control.
- Clip only the peaks you actually need to control.
- Layer kicks and snares only when the break is missing something specific.
- Check the processed break against the sample and bass, not only in solo.
- Compare constantly with the unprocessed version at matched loudness.
The goal is not to make the waveform look bigger. The goal is to make the groove feel stronger.
What You Are Actually Trying to Preserve
When producers say a break has groove, they are usually hearing several things at the same time.
Timing
The snare may sit slightly behind the kick. A ghost note may arrive earlier than expected. The hi hat pattern may push forward while the main backbeat feels relaxed.
If you quantize every slice to the same grid, those relationships disappear.
Velocity and dynamics
A real drummer does not hit every note with the same force. The main snare can be loud while a ghost note is barely audible. Hats may alternate between stronger and softer strokes. Those differences create phrasing.
Transient shape
The front of the kick, the crack of the snare and the softer attack of a ghost note are not identical. Heavy compression or transient shaping can make every part of the break feel equally aggressive.
Decay and overlap
Cymbal tails, room sound and drum resonance often continue into the next hit. That overlap glues the kit together. Cutting every slice too tightly can make the break sound like a collection of unrelated one shots.
Room and bleed
The space around the drums is part of the rhythm. When a snare excites the room, the decay becomes part of what happens before the next kick.
The best processing chain respects these relationships.
1. Start With the Right Break
The easiest drum break to process is the one that already has the pocket you need.
Before doing anything, listen for:
- The relationship between kick and snare.
- The amount of room tone.
- How busy the hats and cymbals are.
- Whether the kick has enough low end for the beat.
- Whether the snare naturally sits in the same emotional space as the sample.
- How much processing the source already contains.
If the break is fundamentally wrong for the beat, processing usually makes the problem more expensive rather than solving it.
For a large source library, The Drum Break Bible contains 633 original drum breaks across jazz, boom bap, soul, funk, lo fi and underground hip hop, with BPM labels for a faster workflow.
If you want a smaller collection built around live jazz movement, Jazz Pocket Vol.1 focuses on natural swing, live dynamics and organic pocket.
2. Match the Tempo Before Heavy Processing
Changing the speed of a break changes more than BPM.
It changes the distance between hits, the length of cymbal tails, the perceived attack of the kick and snare, and the way the room sound connects each event.
That means the processing chain should be built around the final or near final tempo.
If you compress a break at one speed and then stretch it significantly afterward, the compressor envelope may no longer feel connected to the rhythm.
A better order is:
- Choose the break.
- Set the project tempo.
- Time stretch, pitch or chop the break.
- Confirm the groove against the sample.
- Then begin detailed processing.
For a broader breakdown of tempo, swing, layering and drum programming, read How to Make Boom Bap Drums: The Complete Guide.
3. Gain Stage Before You Add Character
Many drum breaks arrive already close to full level. If you immediately drive them into saturation, compression and clipping, every processor begins from an exaggerated input level.
Turn the break down first.
You do not need a specific magic number. You need enough headroom that each processor reacts because you chose to drive it, not because the source was already hitting the ceiling.
Then level match the processed version against the original during comparisons.
This is important because louder almost always sounds more exciting for a few seconds. If your processed break is three decibels louder than the source, you may think the chain improved the groove when it only improved the volume.
4. Use EQ to Make Space, Not to Sterilize the Break
EQ is often where good breaks lose their body.
A drum break is a complete recording. The kick, snare, hats, room and bleed share the same spectrum. Removing a frequency from one problem can also remove character from another part of the kit.
Low end
Do not automatically high pass the break until the kick loses weight.
First decide what the bass is doing. If the beat has a deep sustained bass, the break may need less sub information. If the bass is sparse, the kick inside the break may be allowed to carry more of the low end.
Use the lightest filter that creates the space you need.
Low mids
Breaks can become cloudy around the lower midrange, especially after pitching down or adding saturation.
Instead of making a large cut immediately, sweep for the area that is masking the sample or bass and reduce only enough to restore separation.
Snare body
Be careful around the frequencies that give the snare weight. A break can sound cleaner in solo after a large cut but become weak once the sample comes back in.
Hi hats and cymbals
When the top end feels too bright, a gentle high shelf or low pass filter is often more natural than a deep narrow cut across every cymbal frequency.
The goal is to make the break sit in the record, not to make every frequency technically perfect.
5. Compression: Control the Break Without Flattening It
Compression can make a break feel like one object, but it can also erase the internal dynamics that create the pocket.
Start with the attack.
Slower attack
A slower attack allows more of the kick and snare transient through before gain reduction begins.
This can make the main hits feel punchier while the compressor controls the body and room after them.
If the break becomes too sharp or the snare jumps too far forward, shorten the attack.
Faster attack
A faster attack controls the front of the hits and can make the break feel denser.
Use it carefully. If the kick loses definition and the snare starts sounding smaller, the compressor may be reacting too quickly.
Release
The release should recover with the groove.
If it is too slow, the compressor may still be reducing gain when the next important hit arrives. If it is too fast, the level can pump between every hit and exaggerate cymbals or room noise.
Adjust the release while listening to the complete loop. Watch how the groove moves, not only how much gain reduction appears on the meter.
How much gain reduction?
For transparent drum bus control, one or two decibels can already be enough.
More reduction can work when you want obvious character, but treat it as an effect rather than assuming more compression means more punch.
6. Parallel Compression Is Often Safer Than Crushing the Main Break
Parallel compression lets you keep the original dynamics while adding a denser version underneath.
A simple workflow:
- Duplicate the break or use a send.
- Compress the parallel signal more aggressively.
- Use a faster attack if you want more body and room.
- Use a medium or fast release that moves with the pattern.
- Blend the compressed signal underneath the original.
The main break keeps its transient hierarchy. The parallel layer adds weight and sustain.
This is especially useful when you like the groove but want the quieter information, such as room and ghost notes, to become more audible.
7. Saturation Before Destruction
Saturation is one of the most useful tools for drum breaks because it can add density without forcing every transient through heavy compression.
Depending on the processor, saturation can:
- Add harmonics to the kick and snare.
- Round sharp peaks.
- Bring quieter room information forward.
- Make separate frequency areas feel more connected.
- Reduce the impression of an overly clean digital recording.
Drive it until you hear the break become more connected, then compare at equal volume.
If the ghost notes disappear, the hats turn brittle or the kick loses definition, reduce the drive.
For a deeper guide focused specifically on vintage sampler color, cassette, tape and degraded drum texture, read How to Make Your Drums Sound Dirty and Dusty Like the 90s.
8. Tape and Hardware Character
Hardware processing can be effective because several small changes happen at once.
You may get:
- Saturation.
- Soft transient rounding.
- Frequency shaping.
- Noise and texture.
- Slight compression.
- Changes in perceived depth.
The mistake is assuming the goal is maximum degradation.
Often the best result is the point where the break feels less clinical but the drummer still feels present.
Gorilla Breaks Vol.4 is built around this philosophy, with 40 original breaks shaped through analog hardware and tape while remaining ready for chopping, layering and resampling.
9. Clipping Can Add Density Without the Pumping of Heavy Compression
A clipper is useful when only a few peaks are preventing the break from feeling dense enough.
Instead of compressing the entire envelope, clipping can shave the loudest transients.
Use it gradually:
- Lower the threshold or increase the input until only the strongest peaks are affected.
- Listen to the snare first.
- Then check the kick.
- Listen to the hats and ghost notes.
- Stop before the main hits lose their shape.
If the break suddenly sounds flat at the same volume, you have probably gone too far.
10. Transient Shaping: Use Less Than You Think
Transient shapers can be excellent for a break that is too soft, but they can quickly create a strange hierarchy.
Increasing attack affects more than the kick and snare. It can also bring forward hat transients and percussion.
Reducing sustain can clean the break, but it may also remove the room and cymbal decay that carry the groove between hits.
Use small changes and compare often.
If only the kick needs more attack, layering one kick may preserve the break better than applying a global transient boost.
11. Layer Kicks and Snares Without Replacing the Break
Layering works best when the break remains the main performance.
Ask one question before adding a layer:
What exactly is missing?
If the kick needs low end, add a short low kick.
If the snare needs more crack, add a bright transient layer.
If the break already has weight and attack, do not add another sound only because layering is common.
Align the layer carefully
Zoom in and compare the transient of the layer with the break.
Perfect visual alignment is not always the musical answer. Moving the layer a few milliseconds can preserve the original attack while adding body after it.
Check phase
Two kicks can lose low end when combined even if each sounds strong alone.
Try small timing shifts and polarity changes. Keep the version that sounds strongest in the context of the beat.
Keep the layer quieter than you expect
The break should still sound like the break.
If muting the layer makes the entire groove collapse, the added sound may have replaced too much of the original performance.
12. Do Not Destroy the Hi Hats While Fixing the Snare
One of the difficult things about processing a complete break is that every processor reacts to everything.
A compressor triggered by the snare changes the hat level. Saturation added for the kick also affects cymbal harmonics. A high frequency boost for snare crack can make the hats painful.
When the top end becomes harsh, try this order:
- Reduce the amount of saturation.
- Check whether compression release is bringing the hats forward.
- Use a gentle high shelf or low pass filter.
- Use dynamic EQ only if a specific frequency becomes harsh at certain moments.
Do not immediately remove all the high end. The hats often carry a large part of the groove.
13. Chopping Can Preserve Groove Better Than Rebuilding From One Shots
If you need more control, you do not have to abandon the break.
Chop it into meaningful sections.
Instead of cutting every hit as tightly as possible, keep some of the room and decay around each slice.
You can create:
- Kick slices.
- Snare slices.
- Kick plus hat slices.
- Ghost note slices.
- Short fill slices.
- Half bar or one bar phrases.
This lets you rearrange the performance while keeping more of the original relationships inside each slice.
14. Resampling Is Part of the Processing Chain
Resampling forces decisions.
Instead of leaving a chain of twelve plugins live forever, print a version that feels good and continue from there.
A useful workflow:
- Process the break lightly.
- Resample it.
- Pitch or chop the processed version.
- Layer a clean element only if something is missing.
- Resample again if the combination feels finished.
Each generation becomes a new source rather than another stack of processors.
15. Processing Drum Breaks Inside the MPC
The same principles apply inside an MPC.
A practical MPC workflow is:
- Load the full break.
- Set the project tempo.
- Chop the break manually or by threshold.
- Build a drum program from the useful slices.
- Adjust pad levels before inserting effects.
- Use pad processing only when one slice needs something different.
- Use program or submix processing when the complete break needs shared character.
- Resample the result when the chain feels finished.
The important part is hierarchy.
Pad processing solves local problems. Program and submix processing shape the complete performance. Master processing should be the final layer, not the first attempt to fix the break.
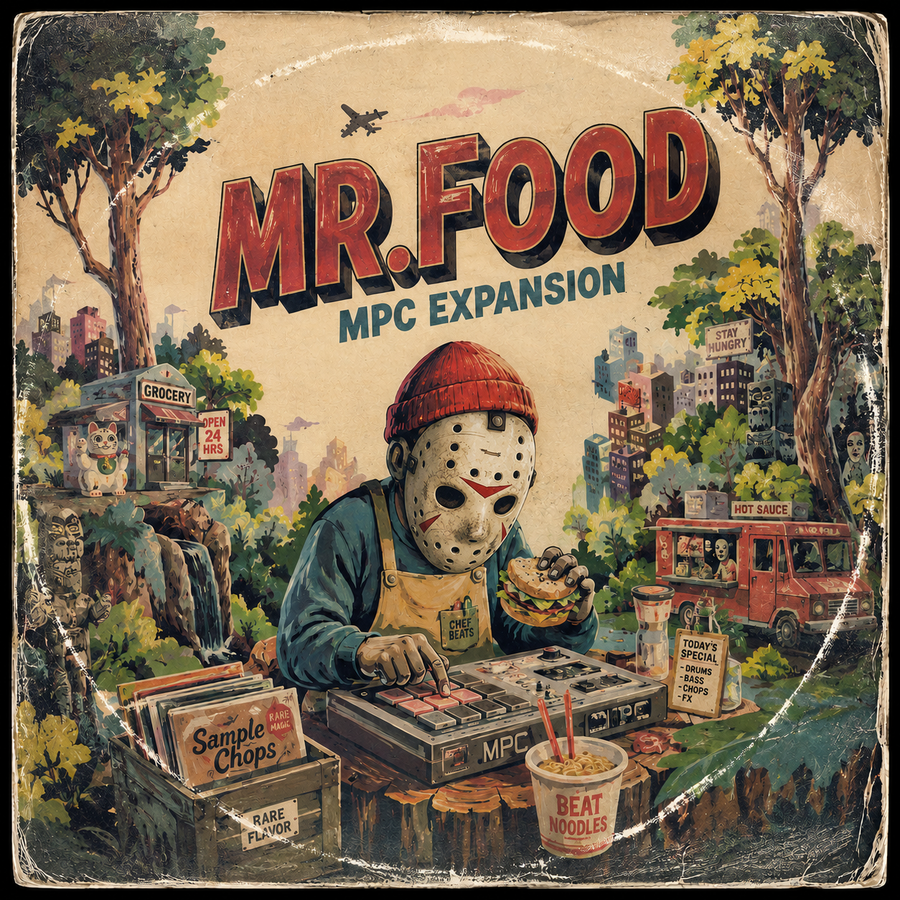
16. A Real MPC Example: MR.FOOD
MR.FOOD is a useful example of this philosophy at the complete kit level.
The expansion includes 30 complete MPC kits, 27 drum breaks, more than 150 drum sounds, 40 full samples, 544 sample chops, 25 bass sounds and a dedicated MR.FOOD Production Template.
The important part is not only the amount of content. It is how the programs are prepared.
Levels, panning, sends, mute behavior and pad level processing are already built into the kits. Depending on the sound and program, the processing environment uses tools such as compression, EQ, lo fi treatment, saturation, clipping, drive, delay and reverb.
That makes MR.FOOD a good example of a key principle from this guide:
processing should support the performance instead of replacing it.
The included 27 drum breaks can be chopped, layered, resampled or rebuilt into new patterns. The additional drum sounds let you reinforce specific hits instead of processing the entire break harder just because one kick or snare needs more weight.
The Production Template also provides a wider routing and processing environment, which makes it useful for studying how individual pad decisions, sends and bus processing can work together inside a complete MPC session.
Explore MR.FOOD and hear the complete MPC workflow.
17. Three Processing Chains That Preserve Groove
Chain 1: Transparent and punchy
Use this when the break already sounds good and only needs control.
- Gain trim.
- Small corrective EQ moves.
- Light bus compression with a slower attack.
- Very gentle saturation.
- Clip only the loudest peaks if necessary.
This chain should sound like the same break, only more finished.
Chain 2: Dusty and controlled
Use this when the break is too clean for the sample.
- Gain trim.
- Broad EQ to reduce unnecessary low end or bright top end.
- Tape or sampler style saturation.
- Light compression.
- Gentle low pass filtering.
- Soft clipping.
The break should become darker and denser without turning into a flat block.
Chain 3: Heavy but still moving
Use this when you want obvious character but still need the groove intact.
- Keep the main break relatively clean.
- Create a parallel bus.
- Compress the parallel bus aggressively.
- Add saturation or drive to the parallel bus.
- Filter the parallel layer so it does not overwhelm the hats or sub frequencies.
- Blend it underneath the original.
- Use a final clipper lightly on the combined drum bus.
This gives you aggression without forcing the original performance to carry all the processing.
18. A 15 Minute Drum Break Processing Workflow
When you want to move fast:
- Minutes 1 to 2: choose the break and match the tempo.
- Minutes 3 to 4: decide whether the full loop or a chopped version works better.
- Minutes 5 to 6: gain stage and make only necessary EQ moves.
- Minutes 7 to 8: add light saturation.
- Minutes 9 to 10: compress while listening to the ghost notes and hats.
- Minutes 11 to 12: layer the kick or snare only if needed.
- Minute 13: control peaks with clipping if necessary.
- Minute 14: compare against the original at matched loudness.
- Minute 15: resample the version you would actually use in the beat.
If the processed break has less movement than the original, go backward instead of adding another plugin.
Common Mistakes
Compressing before deciding the tempo
The timing and decay of the break may change after stretching or pitching. Build the dynamics chain around the version you will actually use.
Removing too much low end
A clean frequency analyzer does not matter if the kick stops carrying weight.
Using a transient shaper on the complete loop because one hit is weak
Fix the individual hit with layering or local processing instead.
Making the processed version much louder than the original
Level match comparisons or you will confuse volume with improvement.
Clipping until every snare is the same size
The loud and quiet relationships are part of the groove.
Cutting every chop too tightly
Leave enough room and decay to preserve the connection between hits.
Trying to make every break sound vintage
Some beats need a dry, open break. Character should match the record rather than follow a fixed processing recipe.
Processing in solo for too long
The sample, bass and arrangement decide whether the break is working.
Frequently Asked Questions
Should I compress every drum break?
No. If the break already has the right dynamics, compression may not improve it. Use compression because you need more control, density or movement, not because it is expected on a drum bus.
How much compression should I use on a drum break?
For transparent control, start with only one or two decibels of gain reduction. Use more when you intentionally want compression as an audible effect.
Should I EQ before or after saturation?
Both can work. EQ before saturation changes what frequencies drive the saturator. EQ after saturation shapes the harmonics created by the processor. A practical chain often uses small corrective moves before saturation and broader tonal shaping afterward.
Is clipping better than compression for drum breaks?
They solve different problems. Compression changes the envelope over time. Clipping controls peaks more directly. Many strong drum chains use both lightly rather than forcing one processor to do everything.
How do I make a drum break hit harder without destroying the swing?
Try gain staging, small EQ moves, light saturation, careful clipping and selective kick or snare layering before using heavy bus compression.
Should I chop the break before processing it?
Usually decide the chop and tempo first, then build the main processing chain. You can still process individual slices afterward when certain hits need different treatment.
How do I keep ghost notes audible?
Avoid excessive gain reduction, heavy clipping and aggressive transient shaping. Parallel compression can raise quieter detail while leaving the original dynamics intact.
Can I process drum breaks entirely inside the MPC?
Yes. Use pad processing for individual slices, program or submix processing for shared character, then resample when the sound feels finished.
Final Thoughts
The best drum break processing does not call attention to the plugin chain.
It makes the kick sit correctly, gives the snare enough authority, controls the top end, adds the right amount of character and leaves the original movement alive.
Start with a break that already has pocket. Match the tempo. Gain stage. Make small EQ moves. Compress only as much as the groove allows. Add saturation before assuming the answer is more compression. Layer individual hits instead of forcing the complete break to solve every problem. Resample when the decision is finished.
For source material, explore the complete Drum Breaks collection, dig into the 633 breaks inside The Drum Break Bible, or start with the analog and tape processed grooves in Gorilla Breaks Vol.4.
For a complete MPC environment where breaks, drum sounds, mapped kits and processing already work together, explore MR.FOOD.



Share:
How to Organize Your Sample Library for MPC and DAW Production
MPC vs SP-404MKII for Boom Bap: Which Workflow Fits You?